Friday, October 26, 2012

Bragging about my girl!

Early last month we had our local show...... I have been patiently waiting since then for Miss 13 to show off her creations on her own blog 'Little Miss Thimble' so that I can then share them with you. Seems that's not going to happen any time soon, so here goes!

Cute heart cushion made from scraps leftover from the quilt I made for her room:
She saw a similar one on pinterest that came from 'U Create' and just made it up as she went along to match the size of the cushion insert that we already had.

Then there's the cute little owl cushion to match..... 

Owl shoulder bag, made from linen.....
Own design, after seeing several similar ones online
(She has had lots of comments on this one so there could be a tutorial coming up soon
if anyone is interested)

First attempt at grub roses..... clever girl!

And..... a monster pencil case!

I'm pleased to say that all her sewing items were first place winners in their various categories....

Then there was her cooking, for which she received several first places as well as a second and a third.
Unfortunately, the photo I took of her novelty cake seems to have disappeared from my phone so I can't share that one with you but she decorated a giant cupcake-shaped cake and it turned out fantastic.

She took home the Over-all junior Champion ribbon for her efforts and was very pleased with herfself!

Will share Master 10's creations with you soon too!

Until then...


Sunday, September 30, 2012

I actually sewed something!!!!

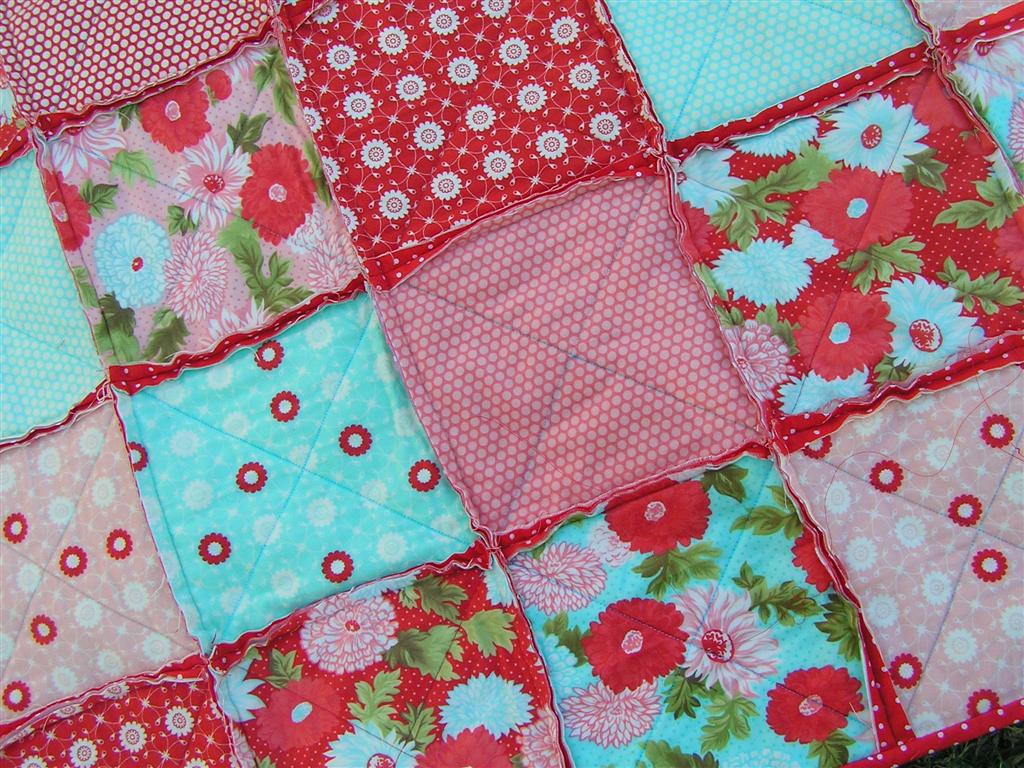
I have actually gotten a little sewing done recently in amongst all the other crazy stuff going on around here..... not quite finished yet as you can probably tell, I haven't yet snipped all the seams or removed my marking lines from the squares but just had to share....

I think the range is 'Ruby' by Bonnie & Camille and being flannel it's just so lovely and cosy.
It's already beng fought over and it's not even finished! (Even hubby commented on how nice it was)

Not very exciting, but I also got this little project done.......

Our recyling used to be picked up in white recyling bags but we now have large bins instead..... I didn't want to throw away the old frame that the bags fit in so I thought I'd make a new bag .... I lined it in ripstop nylon so that it doesn't drip water from the washed containers on Master 10 when he empties it (you'd think it was acid the way he went on, lol).... no more complaining, Yay!

I hope you've all been a lot more productive than I have.
Cheers


Sunday, August 5, 2012

Upsized Charm Square baby Quilt instructions

I've had a few queries about my Upsized Charm square baby quilt's that I made here, herehere and here, so I thought I'd blog about the changes I made rather than detailing the instructions in emails to individuals.

To make mine a little larger, I used 1.5 charm square packs (63 squares).... so with two packs it meant I had enough squares to be choosy about which ones I used.

You will need
42 x 5" squares
21 x 5" squares cut in half to make 42x  5x2.5" rectangles
6 x 2.5" strips of white sashing (39.5" each)
2 x 6.5" strips of white sashing for the top and bottom

You can then make 7 rows, each with six 5" squares and six 5x2.5" rectangles alternating between starting the row with the 5" square or the 5x2.5" rectangle

If you want to add a name etc to the borders, just make templates from a word font to applique.

This one is definately my favourite so far.... I just loved the colours:


I hope this helps.

Cheers
Thimbelina

Sunday, June 24, 2012

Sock Monkey

I've often looked at the various different sock monkey tutorials around and I finally decided to have a go at making one myself. I chose the Tutorial by Craft Passion which you can find here.... I thought hers were cuter than most of the ones I'd seen.

I took the instructions along to our last Club Quilt day and Jo & I both managed to get one almost finished... Paula made hers a couple of days later so I will try to get a couple of photo's of theirs to share with you too.

I'm very happy with how mine turned out.... it was super easy and I'm looking at socks very differently now!

I couldn't help adding a little pink tu-tu and a rosette.... she is for my little niece after all!


Sunday, May 27, 2012

Quilting Retreat

 Last week was our annual Club Quilt retreat....and once again it was a wonderful weekend with great company and lots of creativity flowing!

I took lots of projects along (I was a little over-ambitious as usual) but spent the entire weekend working on a quilt for Miss 13's newly re-decorated room. I'm loving how it's turning out and can't wait to get it off to the quilters!


The fabric I used is Riley Blake, Sugar & Spice and you can find the pattern here at the Quilted Fish
The tutorial is only for a small quilt so I made mine four times the size of the original pattern....hence the amount of time it took to make....well worth the effort though don't you think?

Until next time....

Tuesday, May 8, 2012

Hemming....check!

Club Quilt last Sunday.... unfortunately nothing exciting to show for it as I spent the whole day cutting out so that I'm prepared for our upcoming sewing retreat. I'm looking forward to being better prepared this year so that I can make the most of my sewing time and get lots done.

When I got home I managed to get six pairs of the kids pants hemmed and ready for the winter and I just had to share this great method of hemming jeans which allows you to keep the original hem. You can find the tutorial here at Sew Much Ado. I usually procrastinate when it comes to hemming jeans, (once I left it so long that my daughters jeans no longer fit her by the time I got around to it...ooops!) but not anymore....this method takes about 5 minutes and I did it with no broken needles and no SWEARING! Unbelievable!


The seam lines are quite obvious in these photos but when they're on you don't notice it at all!

Until next time....

Thursday, May 3, 2012

Weekend project

Last weekend Miss 13 and I spent some time putting this mini drawer set together to match her newly painted and re-furnished room.


We purchased the little Kaisercraft draws years ago at a craft fair but never got around to doing anything with it. The frame is timber but the little drawers are made from a heavyweight cardboard and it all just slots together really easily.

I think it's designed to use with scrapbooking paper but we used Riley Blakes 'Sugar & Spice' fabric that I'm planning on making a matching quilt out of later. We painted it in 'Tapioca' first before adding the fabric to the top, sides and drawerfronts and giving it a coat of Mod Podge to protect it.... and voila!
Perfect for holding all those girly bits and pieces!

This is what we started with:
and you can find them here.

Until next time....